|
ECOPIVOTAL |
|
Electronic and technological solutions for a better future |
|
Home | Contact Us | Projects / Systems | Project-Solar heater 1 | Pictures and events | How much energy | Related Links |
|
Home |
|
Contact Us |
|
Projects / systems |
|
Project-Solar heater 1 |
|
Pictures and Events |
|
How much energy |
|
Related Links |
|
This page shows the current steps for construction of a aluminum can based solar heating system. A further overview and details are provided here.
|
|
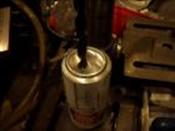
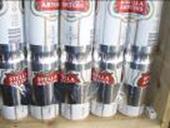
Step 1: Preparing the cans Note that 56 x 440ml aluminium cans are required for the array. After collecting the cans and rinsing, the first step is to remove the ring pulls. Then make a 10 mm diameter hole in the bottom of each can. Make the holes on the alternate side to the existing hole in the top of the can.
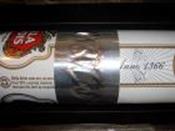
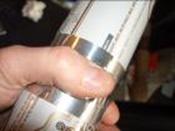
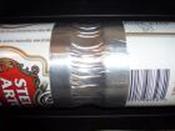
Step 2: Constructing the heat tubes The heat tubes are constructed from 7 cans placed end-to-end. 8 of these tubes need to be made. The cans were joined using 75mm aluminum tape. A piece of 4 inch guttering was used to align the cans whilst they were taped together. After the cans are taped together the joint can be gently compressed. This helps to draw the cans together and tighten the seal. Notes: The top of a can (i.e. ring-pull end) must be at each end of the final tube. This helps placement in the collector manifolds
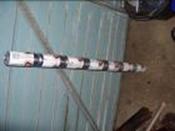
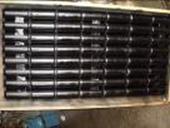
Step 3: Joining the heat pipes and painting 8 of the heat tubes (see above) are joined together using aluminium tape. One side of the assembly is then painted using matt-black high temperature paint. (Note barbeque paint is ideal.
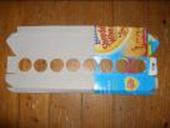
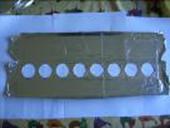
Step 4: Constructing the manifolds Manifolds were constructed to collect the output from each heat tube and also to provide fan mounting areas. The manifolds were constructed using cereal packets from a design template. The inside of the manifold was lined with tinfoil. The manifold was left open until it was placed on the can array.
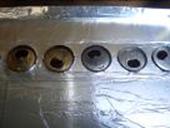
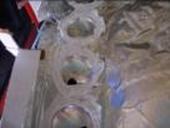
Step 4: Placing manifolds on array The ends of the cans were inserted through the manifold holes and then sealed internally using builders mastic. The manifold was then folded and glued. Finally, the manifold was sealed with aluminum tape.
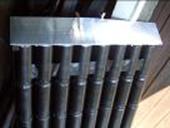
Further steps: final array The final array is shown on the left with the folded manifold.
Further steps to be carried out Some of the following steps are partially completed. Fix unit into case with glass cover. Affix fans and temperature controllers. Connect to heating chamber. |
|
Aluminium can based solar array |
|
Project—Solar heater 1. |